I had an interesting phone conversation with my aunt yesterday. She has been finding the recipes I share on this blog very hard to resist. It has been great fun showcasing some of the food of the Edwardian era, and finding ways to update them to suit a healthier lifestyle. I look for classics which can be lightened up, but for some of the Titanic desserts, the only option might be portion control.
Edwardian cookery is noteworthy because it personifies an era where extravagance was an art form and the formal dining room table its canvas. But somehow the women of Downton Abbey –with the exception of Mrs. Patmore–maintained their girlish figures. Corsets helped a great deal for the ladies who lived upstairs, and we can imagine how many calories were burned by the below stairs workers. Instinctively it seems, servants ate heartier meals for stamina, like a breakfast of steel cut oats (that was what we had this morning) which we now know helps fuel the body for the rest of the day.
The Edwardian diet was not a particularly healthy one; the Downton women could have had amazing metabolisms, but more likely just pushed the food around their plates, and busied themselves with their dinner conversation. There was also those long walks around the grounds or to the village for exercise to burn some calories. Providing a great variety of food was key to impressing guests, but you weren’t forced to eat it all. Seriously, you don’t have to devour a whole tea tray, and it is possible to take a cruise vacation without gaining 10 pounds.
In the spirit of the 2004 movie Super Size Me, BBC created a wonderful television series in 2007 about the history of British food. Restaurant critic Giles Coren and broadcaster, comedian, and vegetarian Sue Perkins live and eat as wealthy Edwardians for a week. The hilarious show appears occasionally on cable TV, but through the magic of YouTube you can enjoy the whole 60 minutes in bite-sized portions at your leisure.
[youtube http://www.youtube.com/watch?v=videoseries?list=PLD45E6A5380E8588E&hl=en_US]
Seriously, Is Our Diet any Better Today?
If you take the time to watch or scan the Supersize episodes there was a great deal of heavy fatty foods in the Edwardian diet. Be grateful I have been selective in the foods I have shared here. Some dishes are really quite nasty and thankfully fell out of fashion. Another brilliant TV show, The Edwardian Manor, followed a group of volunteers who lived as Edwardians in an English country house for six months. At the end the chef complained that the Lord cheated by asking him to prepare healthier foods.
But considering the obesity problem we are now facing today, it appears that we have solved the problem of labour intensive food preparation with convenience foods which have its own set of problems: over processed meals loaded with high fat, sugar, sodium and chemicals which we can’t pronounce.
I recall first being interested in health and nutrition when I started to hear stories on my parents’ friends failing health from heart disease and cancer. I clearly remember how much they ate, smoked and drank. We have a history of heart disease in my family which was another reason to be more careful about eating right and exercising regularly.
The Edwardian Compromise: Stand Up For Real Food
I embrace the idea that when you cook your own food you have a better understanding of what you are putting into your body, which is a growing trend of chefs who promote health over convenience. I never realized how much fat there was in croissants until I first made them (think a block of butter wrapped in some flour). Now whenever I see butter or anything white (flour, sugar) in a recipe I look to find ways to cut them down or out.
May 19th is the first international Food Revolution Day, the brain child of Jamie Oliver. The basic idea is food education and understanding where food comes from. Mrs. Patmore, like other Edwardian cooks who lived in country houses had access to meat raised on the property, fruits and vegetables grown in their gardens, and milk products from their dairy barn. Sadly, unless you grew up or around a farm like I did, you probably give little thought to where your food comes from.
Encouraging people to cook “from scratch” in their own kitchens is at the heart of the Revolution. We all have family and friends who could make better food choices. On Food Revolution Day communities will come together in events around the world (check the website for registered events in your area) to work together to empower people with the skills to improve their diet. Making simple changes to our food choices will improve our quality of life and our children’s.
Grow your own Herbs

Simple changes in your lifestyle can be as easy as growing and using your own herbs. Fresh herbs are a great way to replace salt in your food and improves the flavour of any dish. You don’t need to have a great deal of space to garden. You can start with a window sill herb garden. I grow parsley, sage, rosemary and thyme (just like the song) as well as oregano, chives and mint year round; I started some water cress this year for those yummy tea sandwiches. I start inside in the winter and now it is time to take my little garden outside for the summer. If you have a deck you can keep the plants in a potted environment. Typically, I transplant into larger containers to let them grow. If you live in a house where you do have some area for bedding plants, you can make a little corner for your herbs. You can also grow container crops like cherry tomatoes and strawberries. My parents still have a large vegetable garden which my brothers and I grew up tending so I learned my gardening skills honestly. I think this year I am going to reclaim an area of our yard for more vegetables. Take note that mint will take over your garden if you let it. And watch out for rascally rabbits.
Learn to Bake Bread


So for me, bread making has a personal connection to my family, but you may find the additional benefits in money savings, feeding your family with healthier food, and surprise yourself about what you can achieve. I also need to work on my upper body strength for our annual family salmon fishing trip and kneading dough is a good workout for my weak upper body. The smell of baking bread is definitely an added bonus.
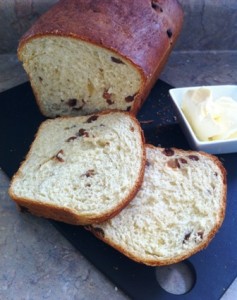
Makin Raisin Bread

Makin Raisin Bread
Ingredients
- 1/2 cup warm water
- 1 tsp. sugar
- 2 tbsp. traditional yeast*
- 1 cup milk scalded and then cooled to lukewarm
- 1 1/2 tsp. salt
- 1/2 cup honey
- 1/2 cup melted butter
- 3 cups raisins
- 2 large eggs
- 5.5 to 6 cups unbleached flour

Instructions
- Proof: Pour 1/2 cup water into a small glass measuring cup or glass. Add 1 tsp. sugar, but don’t stir. Slowly sprinkle the yeast into the water, making sure each particle gets wet. Don’t stir. Wait 10 minutes until the yeast is thick and foamy.
- Mix: Whisk together milk, salt, honey, eggs and 1 cup of flour in a large ceramic bread bowl. Add raisins and stir with a wooden spoon.
- Add Flour: Add the remaining flour one cup at a time to make a soft dough. Coat the dough with flour before turning it over onto the kneading surface.
- Knead: Dust the kneading surface with flour before adding the dough. Dust your hands with flour and knead the dough for 10 minutes (12 minutes if you are new to bread making or if you have puny upper arms like myself!).
- 1st Rising: Ater kneading, place the dough in your cleaned bread bowl which you grease with some butter, turn over the dough so the top is greased and set in a warm, draft free spot and allow to double for 2hours.Use your oven: turn the oven light on (but don’t turn on your oven), and pour boiling water into a frying pan on the lower rack of your oven. Place your bread bowl on the upper rack.
- Shape: you know when your dough has sufficiently risen if it looks like it has doubled and if you poke your fingers into the center, they come out clean. Punch the dough down, knead it briefly and let it rest a few minutes. Cut in half, shape into loaves, and place each loaf into a greased pan. Pull out any raisins sticking out as they will burn. Put the bread pan back in its warm happy place so it can double again which should take another 45 minutes.
- Bake: Optional- mix some melted butter with cinnamon and brush the tops of the loaves. Preheat your oven (remember to take out the frying pan before you turn on the oven) to 400 F and bake for 10 minutes. Reduce the heat to 375 and bake for a further 20-25 minutes.
- Cool: Immediately turn out the dough out of the pans and tap the bottom of the loaf. If it sounds hollow, it is done. If it sticks are you are trying to take it out, it likely is not done. As a double check, insert a toothpick through the bottom and it should come out clean. Let cool on baking racks.
- Slice and Enjoy: I am not a big fan of electric knives but they are the perfect tool to cut the bread if you wish to have it hot. Otherwise use a serrated knife when the bread has cooled. Turn the bread on its side to help you make even slices.