
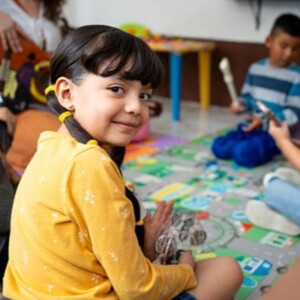
Sound buttons teach ears before fingers, and that’s their main advantage. A child who presses a button and hears a cello learns timbre without fighting posture, breath, or bowing. The first lesson needs no bow, reed, or mallet. Technique arrives later, once the sound already feels familiar and the instrument looks friendly.
Most classroom plans reverse that order. Instruments come out first, children grow frustrated, and the sound becomes an afterthought. A structured button routine fixes the sequence by pairing each recorded tone with a picture, a movement, and a name.
Brain Change Begins Within Months, Not Years
Young children showed structural brain changes after just 15 months of instrumental training. Gains in musically relevant auditory and motor skills tracked those changes. According to soundboardbuttons.com, a site where music teachers find free sound buttons for classroom listening games, “Clear, short instrument sounds help kids learn what each instrument sounds like before they ever hold one.” That head start matters because traditional lessons demand posture, breath control, and finger coordination from day one.
Sound buttons remove those physical hurdles. Kids can focus entirely on tone, pitch, and volume. Ears lead, and hands follow, so every child builds listening skills before worrying about technique.
Button Setup Decides Whether Children Listen or Merely Tap
 Recordable and preloaded models both exist, and only recordable sound buttons let teachers choose every clip. Large, brightly colored buttons suit small hands and make picture matching clear. Volume settings matter because loud, sharp clips startle sensitive listeners. Clips should run short, sound clean, and stay free of background noise.
Labels with the instrument’s name and a photo finish the setup. Clarity beats variety every time. Six to eight buttons per station give enough choice without causing confusion.
Three Instrument Families Deserve the First Recordings
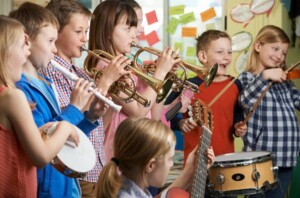
Strings, winds, and percussion offer the widest timbre contrast for children. Each family needs one clear, short recording per button, with no background accompaniment. Recordings under five seconds keep attention on a single tone instead of a melody.
String and Bowed Tones
Sustained, singing sound defines violin and cello recordings. Children hear the tone glide and swell rather than strike sharply. Pairing the recording with a picture of the violin or cello completes the link.
Wind and Brass Colors
Breath shapes tone in flute, clarinet, and trumpet recordings. Short notes and long notes contrast clearly on repeated presses. Brass clips add a bright, buzzing edge that flute clips lack.
Drums and Mallets
Through snare, xylophone, and tambourine recordings, rhythm gains a physical shape. Children can tap along without needing to know pitch. Two- or three-beat rhythm patterns let the whole class echo together.
A Five-minute Routine Replaces Long Demonstrations
Short, repeated routines suit young attention spans better than one long demonstration. Sound buttons support a cycle that fits between any two lessons. Each week adds one new instrument while earlier recordings stay available for review. Consistency matters more than length.
Press, Listen, and Name
Children press a button, listen twice, and say the instrument’s name aloud. Naming anchors the sound to vocabulary. Repeating the same order daily builds confidence, speed, and accuracy.
Match Tones to Pictures
Place a picture card beside each button, and have children match each tone to its image. Mistakes correct themselves because the next press supplies the answer. Children also sort cards into string, wind, and percussion piles.
Move to the Sound
Low tones invite slow, heavy steps, while high tones invite quick, light ones. Movement turns abstract pitch into a physical, memorable idea.
Live Instruments Should Arrive Once Recordings Feel Familiar
Recordings prepare the ear, but vibration, touch, and breath complete the lesson. A teacher brings in one real instrument, such as a hand drum or recorder. Children find the matching button and compare the live tone with the recording.
Differences in volume, resonance, and decay become audible and memorable. Playing comes second, listening first. Safety and careful handling come before any turn. Each child makes one sound, then returns to the buttons to compare.
Why Does Listening Practice Reach Beyond Music Class?
Eight-year-olds who received music training improved at speech segmentation over two years, while children assigned to painting did not. A separate study found music coursework helped low-income teenagers maintain reading scores. Reading scores dropped for students without music courses.
Language and music both depend on detecting small differences in timing, pitch, and duration. Repeated, low-pressure listening games sharpen timing and pitch detection. Phonics, rhythm, and syllable counting all draw on fine-grained hearing, which button games exercise daily.
How Do Shared Sets Stretch Small Budgets?
Dedicated music instruction reached 94 percent of public elementary schools in 2009-10. Sound buttons slot into those existing periods without new rooms, schedules, or specialist hires. One set circulates between classrooms on a cart.
Teachers record clips once, label buttons clearly, and reuse the set for years. Whole-class listening lets one set serve an entire class at once. Replacing worn batteries costs far less than replacing a damaged violin. Pressing a large button also removes barriers for children who struggle with fine motor control.
Simple Checks Reveal Which Sounds Children Recognize
Observation beats worksheets for children so young. Teachers track three signals during each session:
- Correct naming after one press without a picture cue.
- Accurate sorting of tones into string, wind, or percussion groups.
- Spontaneous requests to hear a recording again or to try the real instrument.
Recording quick notes after each session reveals patterns across weeks. A simple chart with instrument names and checkmarks keeps records clear. Once all three signals appear, you can begin formal lessons on a first instrument.