The Oreo – that iconic cookie we know and love consisting of two dark chocolate wafers hugging a sweet vanilla creme center. It reigns supreme as the best-selling cookie in the United States, with over $1 billion in sales annually! Did you know Oreos have a fascinating history that stretches back over a hundred years?
This beloved cookie first arrived on the baking scene in 1912, when the National Biscuit Company (now known as Nabisco) debuted the Oreo Biscuit. It consisted of two biscuits joined together with a newly invented creme filling. Remarkably, the original Oreo design closely resembles the version we enjoy today – from the nibbled edges of the chocolate wafers to the distinctive Oreo embossing.
 While the origin of the name “Oreo” remains a mystery, some believe it was chosen because the cookie itself is such a perfect “O” shape. There’s no denying that round sandwich structure makes Oreos highly stackable while also easy to twist apart. And that satisfying snap when separating the two sides? Iconic.
Of course, the star component that ties each cookie together is the creamy, vanilla-flavored creme. Nabisco’s decision to sandwich their biscuits with a smooth, sweet filling was ingenious. It created a delightfully soft textural contrast to the crisp chocolate wafers that proved highly addictive.
Over the decades, Oreos have earned a special spot in the American pantry as they’re enjoyed by generations of cookie lovers. They’re estimated to be welcomed into around 9 million homes per week – now that’s popularity! Part of the fun with Oreos is finding playful and inventive new ways to enjoy them.
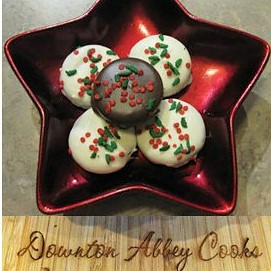
Take chocolate-covered Oreo cookies for example. By simply dipping Oreos into melted chocolate, you can quickly create an elevated cookie perfect for gifting or displaying on holiday cookie trays. The rich chocolate complements the recognizable sweet vanilla creme, taking this classic treat up a notch.
Of course, chocolate-covered isn’t the only creative preparation for Oreos. Between colourful Oreo truffles swirling creme into cheesecake and fudge bites, Firework Pop Oreos stacked high with rainbow sprinkles, and Oreo crust pies or cheesecakes, there’s no limit to Oreo innovation.
It seems America’s love for Oreos only continues gaining momentum too. New seasonal flavour drops like Candy Corn Oreos or Brookie-O Oreos consistently ignite social media and drive customers to stores in droves. And Oreo has partnered with brands from Dunkin’ Donuts to Baskin Robbins, blending cookies with donuts and ice cream for head-turning limited releases.
So next time you spot that familiar blue Oreo package, remember you’re looking at over a century’s worth of cookie success. Those 12 deliciously dunkable cookies connect us to 1912 while still tasting perfectly modern. Consider taking your Oreos up a creative notch by coating them in chocolate or completely reinventing them into a new tantalizing Oreo dessert! Those iconic chocolate wafers and vanilla creme continue delighting generation after generation – what’s not to love?
Festive Chocolate Dipped Oreos For all Seasons
Equipment
Ingredients
- 24 Oreo Cookies
- 1–2 cups chocolate melting wafers white or brown
- ½ cup white chocolate melting wafer or chips optional
- 2 tbsp. sprinkles optional
Instructions
- Prepare a cookie sheet lined with parchment paper.
- Melt chocolate by placing in a metal bowl over a pot of simmering hot water. Do not let the metal bowl touch the water below.
- Lightly tap each Oreo cookie before dipping to ensure that no crumbs enter the chocolate bath.
- Drop a cookie into the chocolate bath. Use your dipping fork to rescue the cookie, grasping the “cookie ridge” between the two layers to give you a grip on the cookie.
- Gently tap the cookie on the side of the bowl to remove the excess chocolate. Place the cookie on the cookie sheet. If you want to add sprinkles, time to do it before the cookie dries.
- Repeat the process for the amount of cookies you wish to make. If you need more chocolate, simply melt more in your pot. If you have extra chocolate you can pour into a plastic container and when it hardens, remove and store in a plastic bag.
- If you want to pipe a message in another colour instead of sprinkles, to that once the cookie has dried. Melt chocolate, but don’t let it get too hot as it will scorch. pour into a small Ziploc bag and cut off a tiny corner so serve as your piping bag.
- Clean up your cookies by running a sharp knife around the edge to clean up any chocolate drips. These cookies will last for at least a month in an airtight plastic container.


